Installation
Install Nowledge Mem on macOS, Windows, Linux, or connect from iOS and Android
Download Nowledge Mem
Nowledge Mem can be downloaded directly:
- Download: open the download page for macOS, Windows, and Linux builds
- Manage access: sign in at mem.nowledge.co/licenses for Mem Vault devices and receipts
What to do right after install
Do not configure everything at once. After the app opens, go to Start Here, save one memory in the Timeline, and choose only one connection path for the tool you actually use.
System Requirements
Minimum system requirements:
| Requirement | Specification |
|---|---|
| Operating System | macOS 15 or later Windows 10 or later Linux x86_64 (Ubuntu 22.04+, Debian 12+, or AppImage for other distros) |
| Memory (RAM) | 16 GiB minimum |
| Disk Space | 10 GiB available |
| Network | If using a proxy, ensure it bypasses 127.0.0.1 and localhost |
Linux headless servers are also supported. See the Linux Server Deployment guide to run Nowledge Mem on servers without a desktop environment.
GPU acceleration. On a Mac with Apple Silicon, on-device work (local search and the built-in model) uses the GPU automatically through Metal, with nothing to set up. On Windows and Linux the desktop app runs on the CPU, which is the right choice for almost everyone. If you want GPU acceleration on a server or workstation, run Nowledge Mem with Docker: the CUDA image (NVIDIA) and the Vulkan image (AMD and Intel) are described in Docker Deployment.
Installation Steps
Step 1: Install the Application
Drag Nowledge Mem to your /Applications folder.

 Applications
Drag Nowledge Mem to your Applications folder
Step 2: Launch the Application
Double-click the Nowledge Mem icon in your Applications folder to launch the app for the first time.
First Boot Troubleshooting
If the app takes too long to start or shows errors:
- Service timeout: If you see "It took too long to start the service", this usually means a global proxy is preventing access to
localhost. Disable your proxy and try again. - macOS version: Ensure you're running macOS 15 or later. Older versions are not supported.
- Need more help? Check the Troubleshooting Guide to view logs and get detailed diagnostics. You can share logs with our community or email support for assistance.
Step 3: Install The Required Models
After launching Nowledge Mem, install the models the app asks for (approximately 2.4GB total):
On-device LLM Platform Support
- Apple Chip Mac: On-device LLM is supported.
- Windows: Remote LLM is required.
- Intel Mac: Remote LLM is required.
- Linux: Remote LLM is required.
Check notifications
You'll see download prompts in the top-right corner of the app
Navigate to models
Click the notification button, or go to Settings → Models
Install models
Click Install on the model card the app prompts you to download
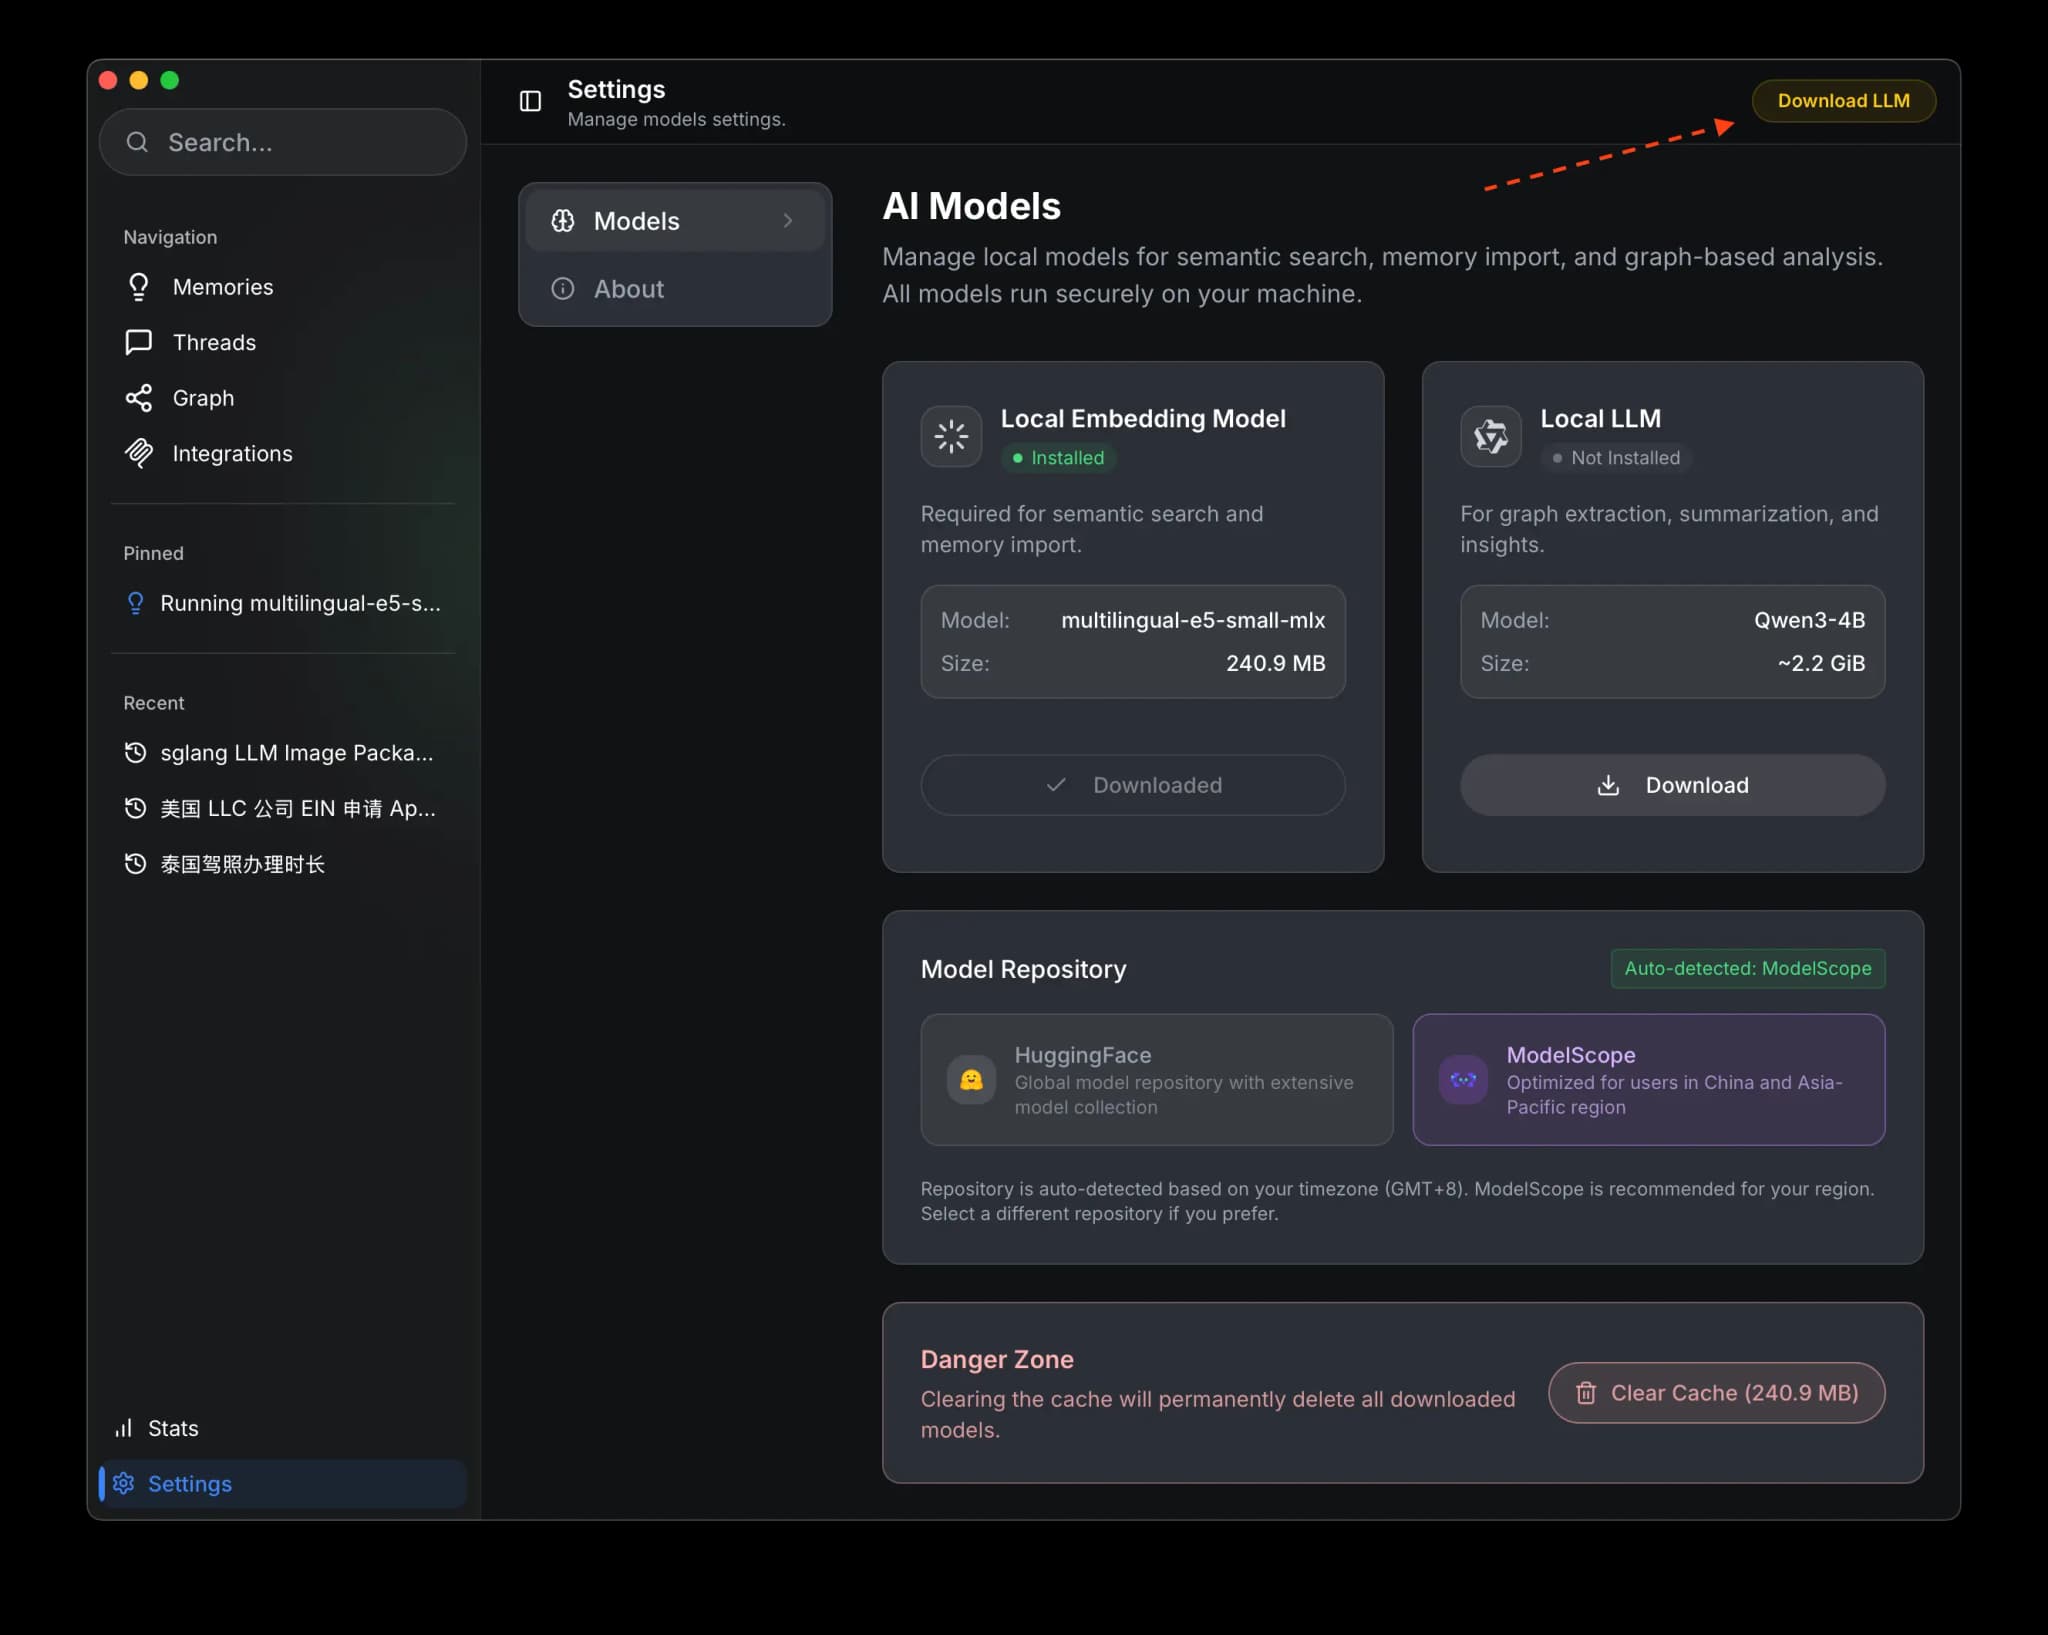
The download will begin automatically, and you can monitor the progress:
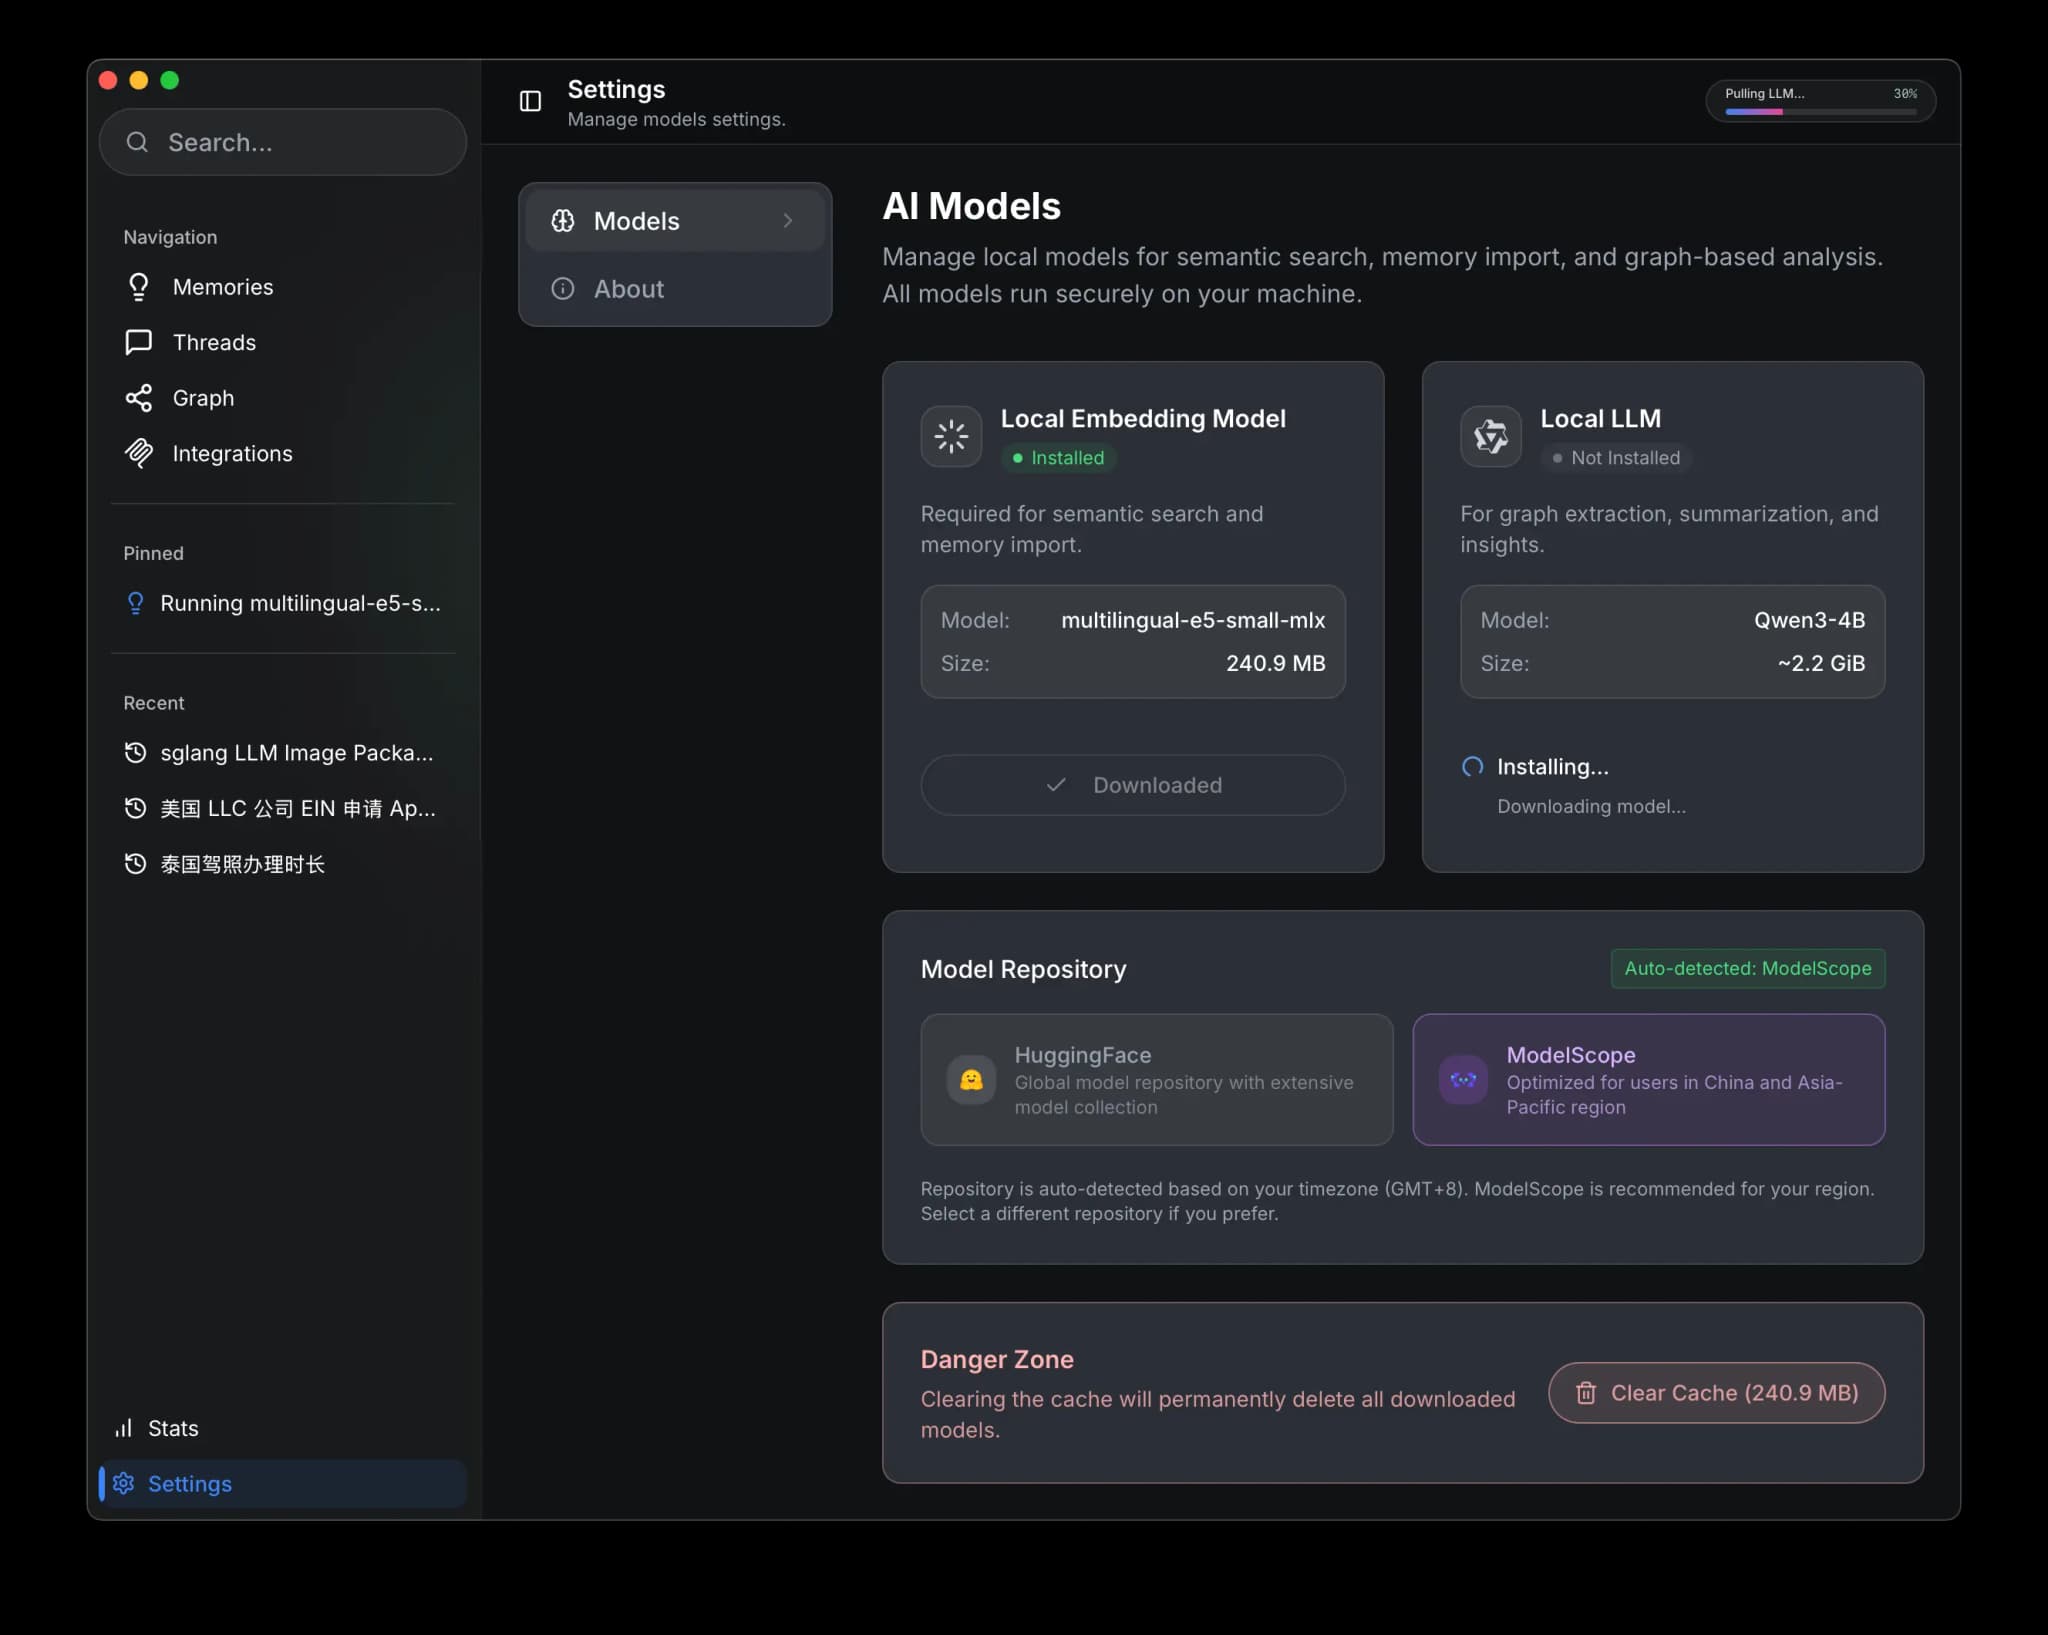
Download Time
Depending on your internet connection, the download may take 5-15 minutes. The models only need to be downloaded once.
Optional: Install The Browser Extension
The Nowledge Mem Exchange browser extension is optional. Install it if you want to capture insights and thread backups from supported web AI chat platforms.
After installing, click the extension icon to open the side panel or sidebar. Configure your LLM provider in Settings to enable auto-capture.
Supported web AI chats
ChatGPT, Claude, Gemini, NotebookLM, Microsoft Copilot, Perplexity, DeepSeek, Kimi, Qwen, POE, Manus, Grok, and more. The extension can capture valuable insights and full thread backups from supported sites. See the Browser Extension guide for details.
After Installation
Installing the app gives you the memory system itself. The next step is not "configure everything." It is to prove one real workflow:
- Save one memory in the Timeline
- Choose one path that matches the tool you already use
- Confirm it works before adding anything else
For most people, the three main paths are:
- Use a dedicated connector when your tool has one: Claude Code, Grok Build, Codex, Gemini CLI, OpenClaw, Hermes Agent, Alma, Cursor, Droid, OpenCode, Copilot CLI, Pi, or Bub
- Use the browser extension if your work mostly happens in ChatGPT, Claude, Gemini, Microsoft Copilot, or other supported web chats
- Use the app itself first if you want to learn Mem before wiring external tools
Everything else, reusable packages, nmem CLI, and direct MCP, is secondary unless your tool actually needs it.
If you already know you want one always-on Mem and several connected devices, read Sync Across Devices first, then follow Access Anywhere for setup.
Mobile Apps (Preview)
Native iOS and Android apps are available as preview clients. They connect to your desktop Mem through Access Anywhere: your data stays on your main machine, and the mobile app gives you search and capture on the go.
- iOS: Join the TestFlight
- Android: Download the APK
Both require a running desktop Mem with Access Anywhere enabled.
Next Steps
- Start Here: The shortest path for new users
- Getting Started: Your first five minutes with the Timeline
- How To Know Mem Is Working: Verify search, capture, and tool connections
- Connectors: Connect Claude Code, Grok Build, Codex, Cursor, and other AI tools
- Sync Across Devices: Understand the single-Mem, multi-client sync model
- Linux Server Deployment: Run headless on a Linux server